 smabo
smaboRoadmap#
This page is the guide for the "smabo-brain" node on the roadmap below.
Overview#
This page explains the setup procedure for "smabo-brain".
smabo-brain serves as:
- The hub relaying all components
- Running advanced tasks such as image processing and AI
Setup Target (PC or SBC)#
smabo-brain can be set up on:
- External PC
- Install smabo-brain on a separate PC (not smabo itself)
- SBC (Single Board Computer)
- Attach an SBC to smabo and install smabo-brain on it
The smabo-brain setup is the same for both. The SBC option additionally requires:
- 3D printing the SBC mounting parts
- Attaching the SBC to smabo
(Note: the 3D printing steps for the SBC mounting parts are covered in Creating the Base Parts.)
We recommend starting with the External PC option.
Supported SBCs
The following SBCs currently have available mounting parts:
- Raspberry Pi (4 or 5)
For other SBCs, you will need to design custom mounting parts using CAD software.
Required Parts#
Parts required to implement this feature:
| Part | Product URL | Notes |
|---|---|---|
| [Optional] Raspberry Pi 4 or 5 | - | Required only for SBC setup |
Setting Up smabo-brain#
The following explains the setup steps for smabo-brain.
From here, you will need to enter commands using the "terminal".
Terminal
A terminal (also called a CLI or command-line interface) is a text-based screen for controlling a computer using only keyboard input.
In software development, the terminal is commonly used to run commands and scripts.
Installing VSCode#
First, set up an environment for using the terminal.
We will use Visual Studio Code (VSCode), a popular code editor.
Download and install VSCode from the official site, selecting the installer for your operating system:
Once the download is complete, install and launch VSCode.
Using the Terminal (Linux / macOS)#
The TERMINAL tab at the bottom of the window is the terminal.
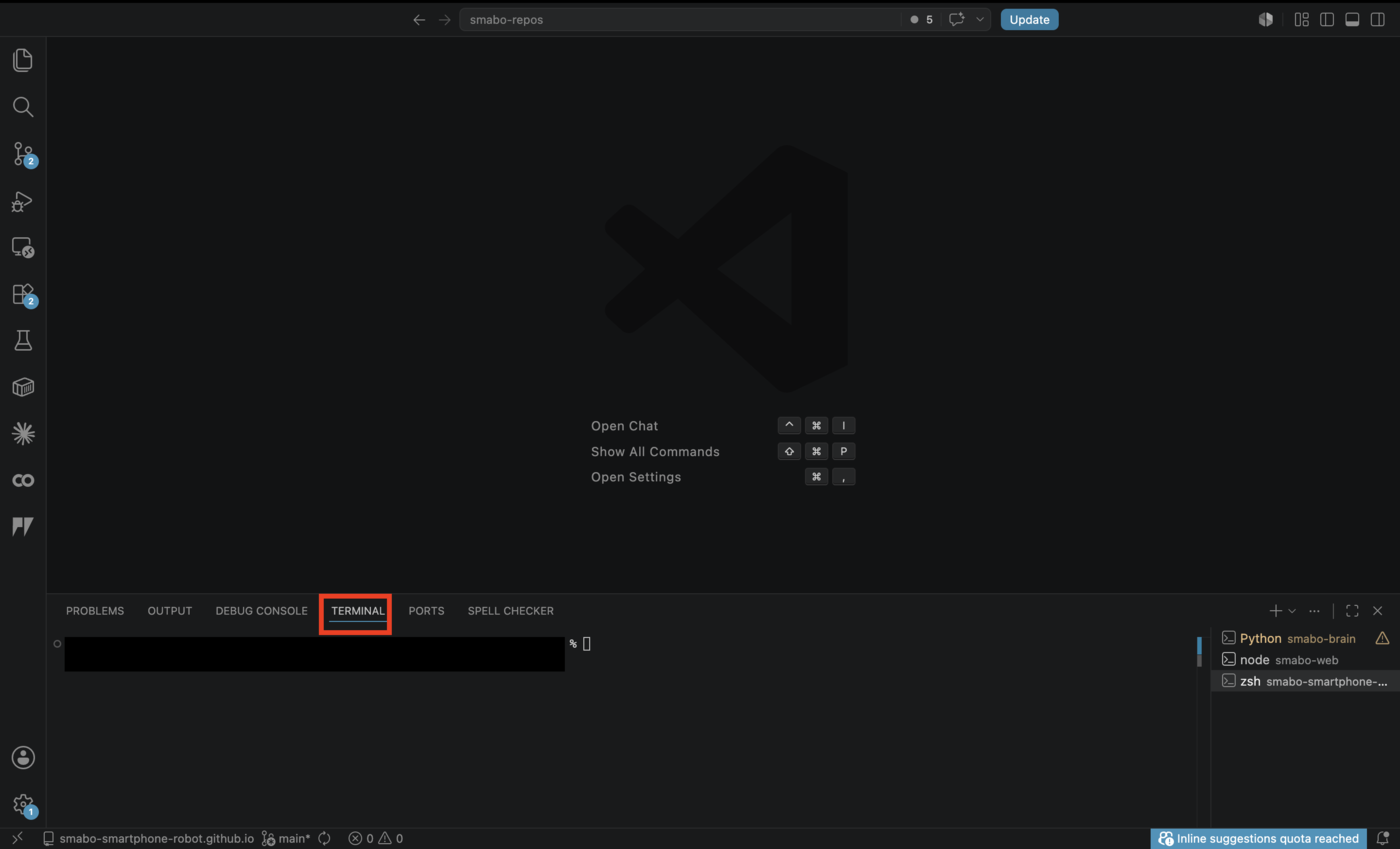
Whenever a command appears in this guide, enter it in this tab.
Using the Terminal (Windows)#
If you are using a Windows PC, please install WSL.
WSL (Windows Subsystem for Linux) lets you run a Linux environment inside Windows.
- Run a Linux environment on Windows
Linux is widely used in robotics development, so working inside WSL is recommended for future convenience.
Installing WSL
For WSL installation instructions, refer to the following article:
Enabling Mirrored Mode
By default, WSL2 cannot communicate with external devices on your network.
Since smabo requires communication with the smartphone and ESP32, configure WSL2 in mirrored network mode. Refer to the following article:
wsl2 mirroredネットワーク、WindowsとLinuxの良いとこどり!
Installing the Extension
After installing WSL, install the following extension in VSCode:
- WSL
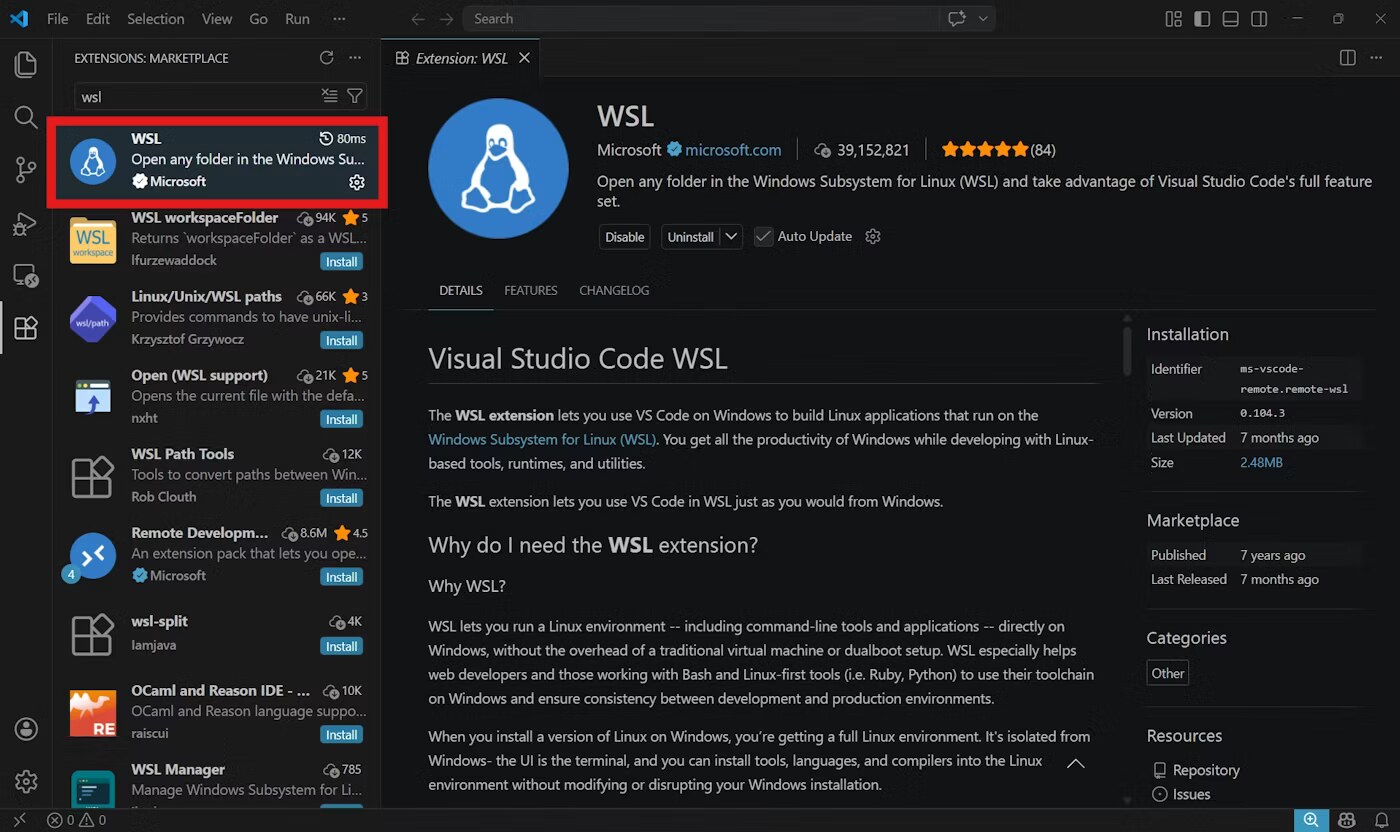
Entering WSL
After installing the extension:
- Click the "><" icon in the bottom-left corner
- Click "Connect to WSL"
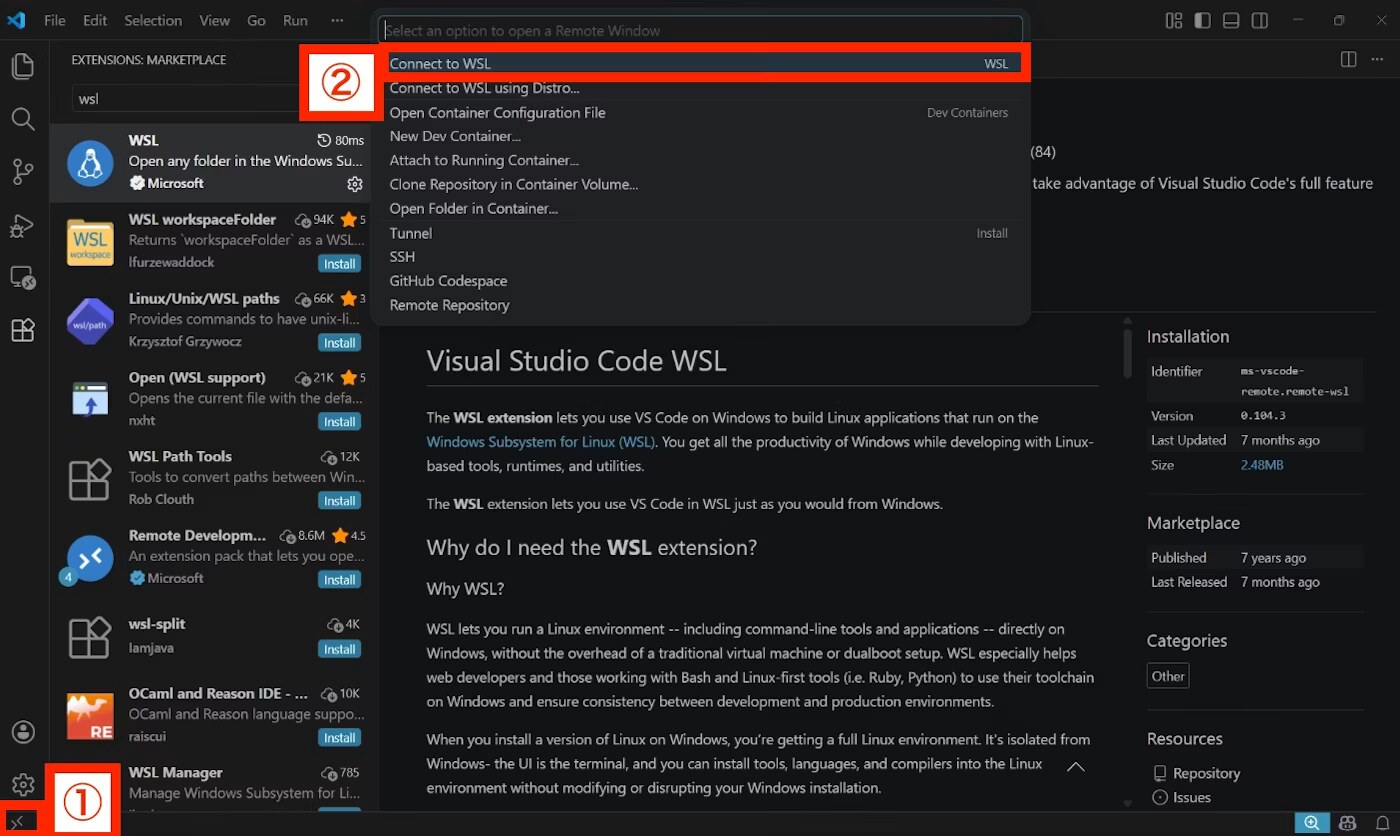
If "WSL: Ubuntu" is shown in the bottom-left corner, you are connected. The TERMINAL tab at the bottom of the window is now your terminal.
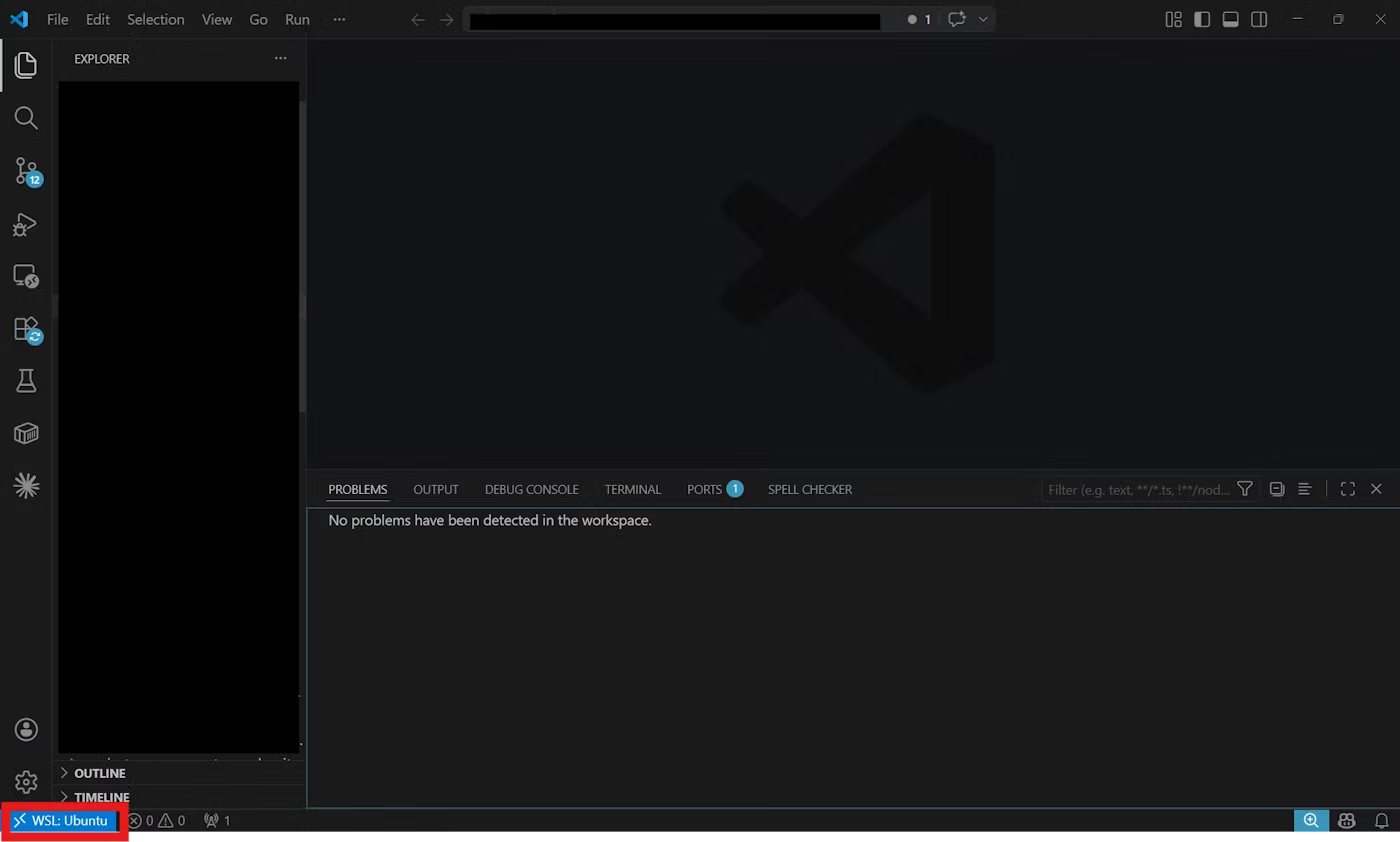
Whenever a command appears in this guide, enter it in this terminal.
Cloning smabo-brain#
Clone the smabo-brain repository with the following commands.
# Move to home directory
cd ~
# Clone smabo-brain repository
git clone https://github.com/smabo-smartphone-robot/smabo-brainInstalling Packages#
Install the packages required to run the programs.
cd ~/smabo-brainpip3 install -r requirements.txtOperation#
Startup Procedure#
Follow the startup procedure here.
If smabo-brain starts without errors, setup is complete.
Next#
Next, follow the guide for: