 smabo
smaboRoadmap#
This page is the guide for the 'Hand' node on the roadmap below.
This guide assumes you have completed the smabo-esp32 setup.
Overview#
This page explains the Hand feature.
Specifically, you will implement:
- Manual controller control of the hand
- Random motion control of the hand
Required Parts#
The following parts are required to implement this feature.
| Part | Product URL | Notes |
|---|---|---|
| ESP32-DevKitC | link | Compatible alternatives OK |
| Breadboard (SAD101) |
link | Standard breadboards have 5 holes per row, but this one has 6 — required for the ESP32's width. |
| Jump wires | link | - |
| Battery box (AA ×4, battery-snap compatible) | link | Battery snap version is recommended for easier handling. |
| Battery snap (for battery box) | link | A version with connector pins is recommended — easier to insert into the breadboard and less likely to come loose. |
| Rechargeable AA batteries × 4 | link | Rechargeable batteries are recommended. |
| Battery charger | link | - |
| Servo motor driver PCA9685 | link | Compatible alternatives OK |
| SG90 × 2 | link | Compatible alternatives OK, but if the horn size differs from the genuine part, the printed parts may not fit — horn trimming or 3D model modification may be required. |
3D Printing Parts#
Print the newly added parts on your 3D printer.
Because slicer software varies by printer model, only key points are noted here rather than step-by-step slicer instructions.
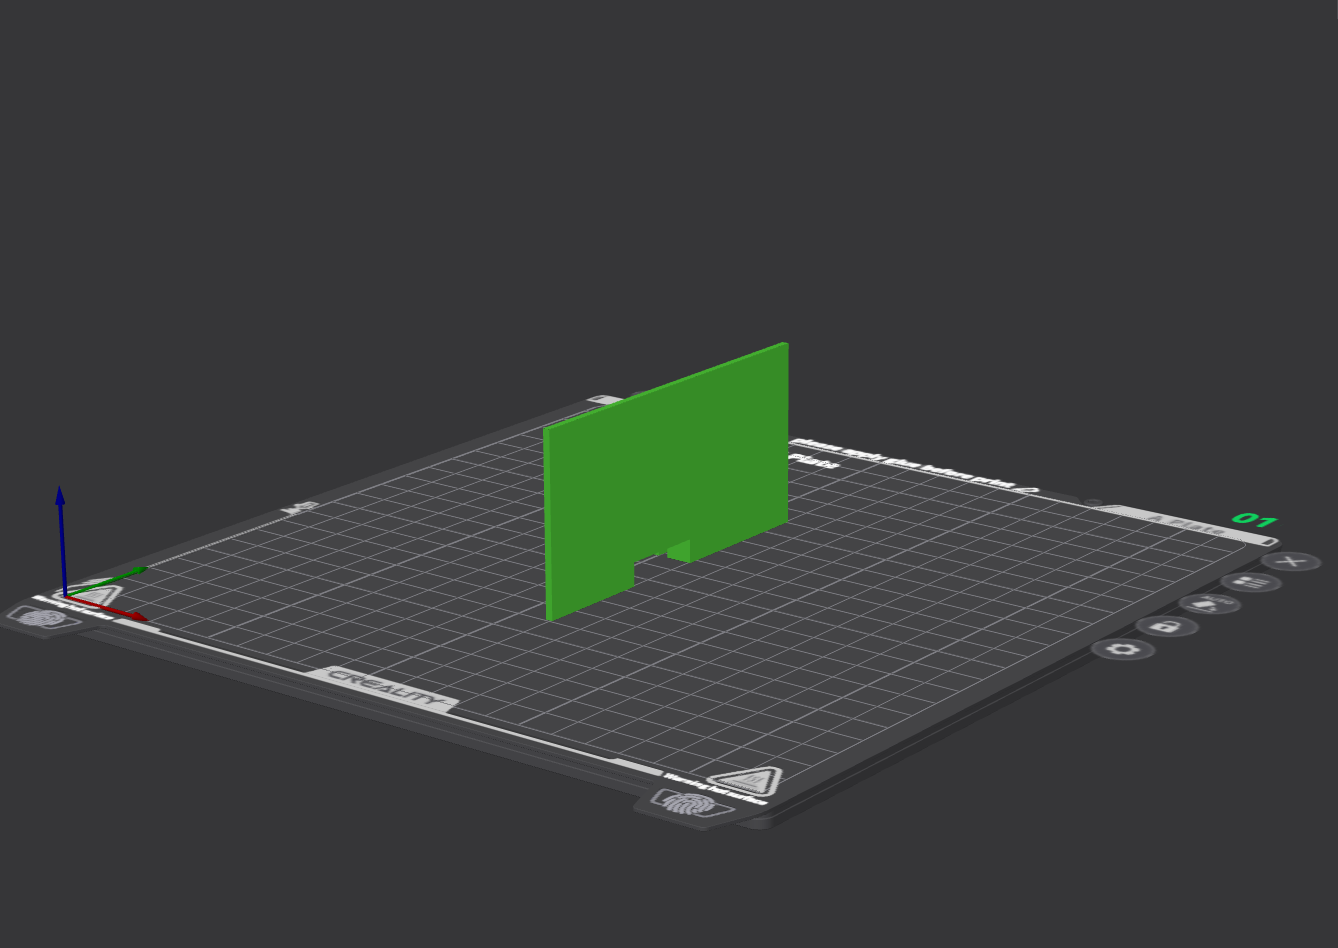
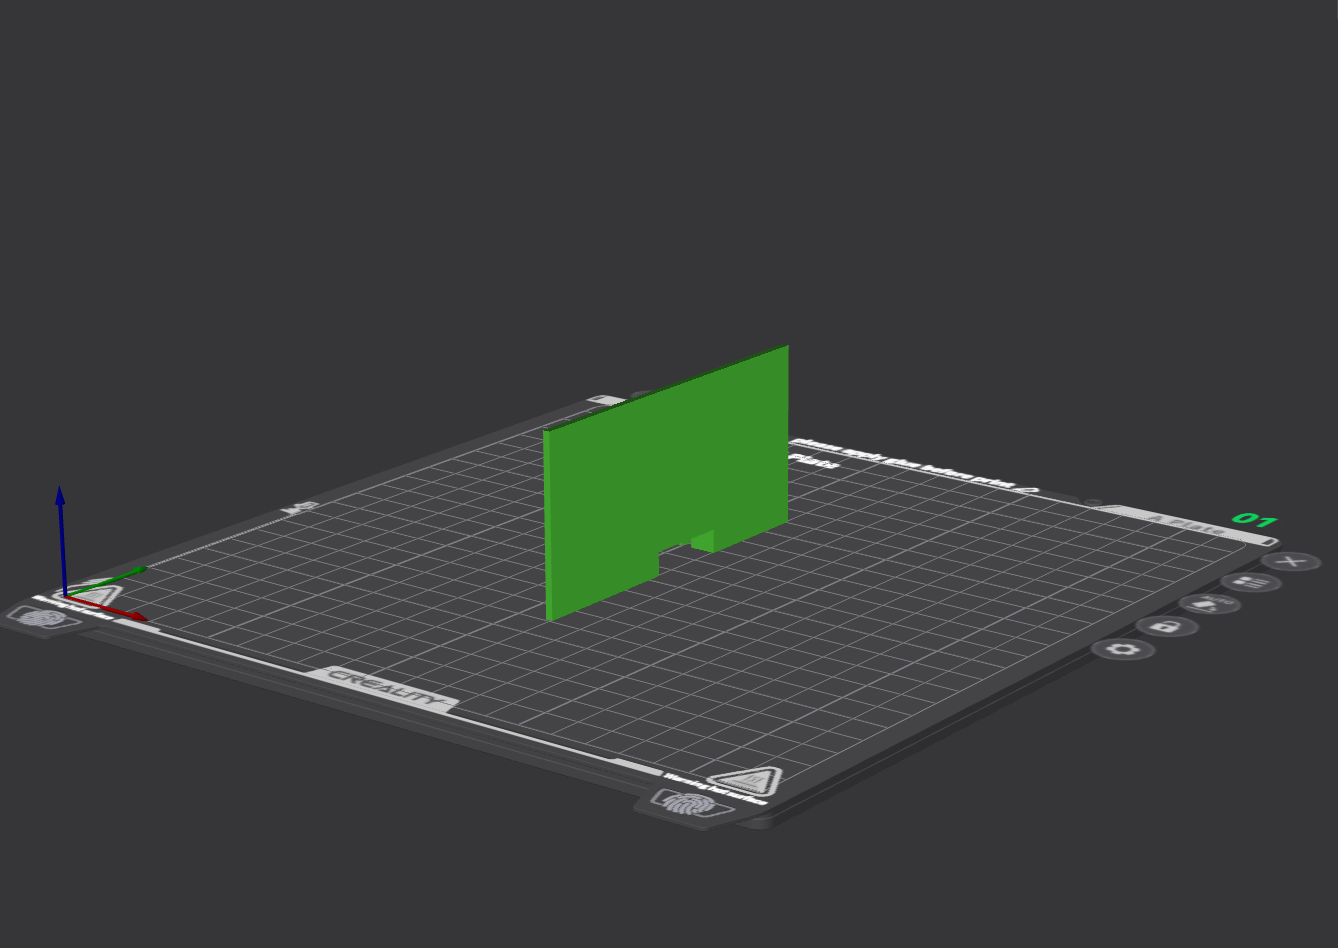
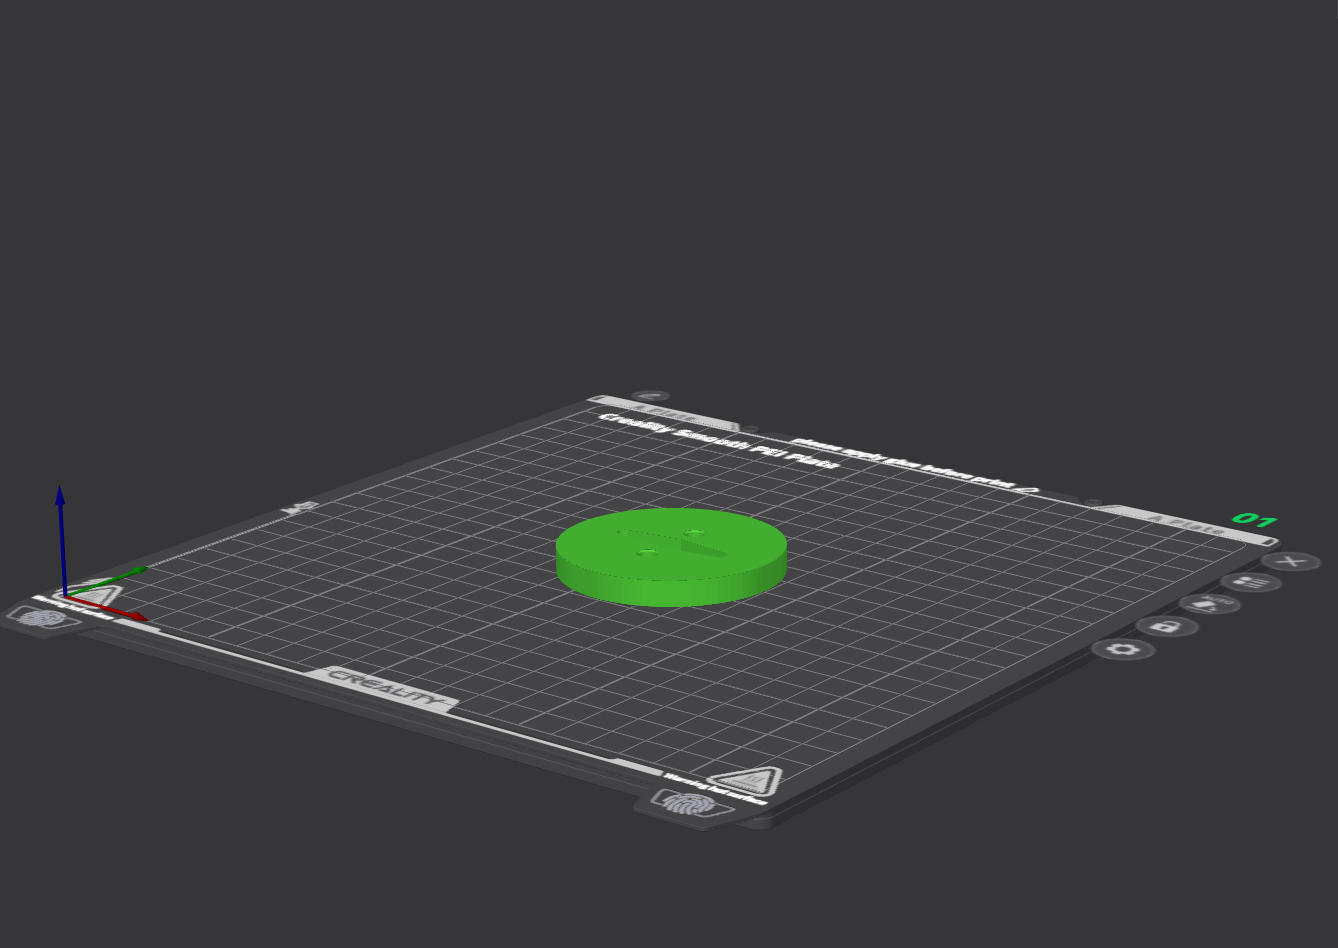
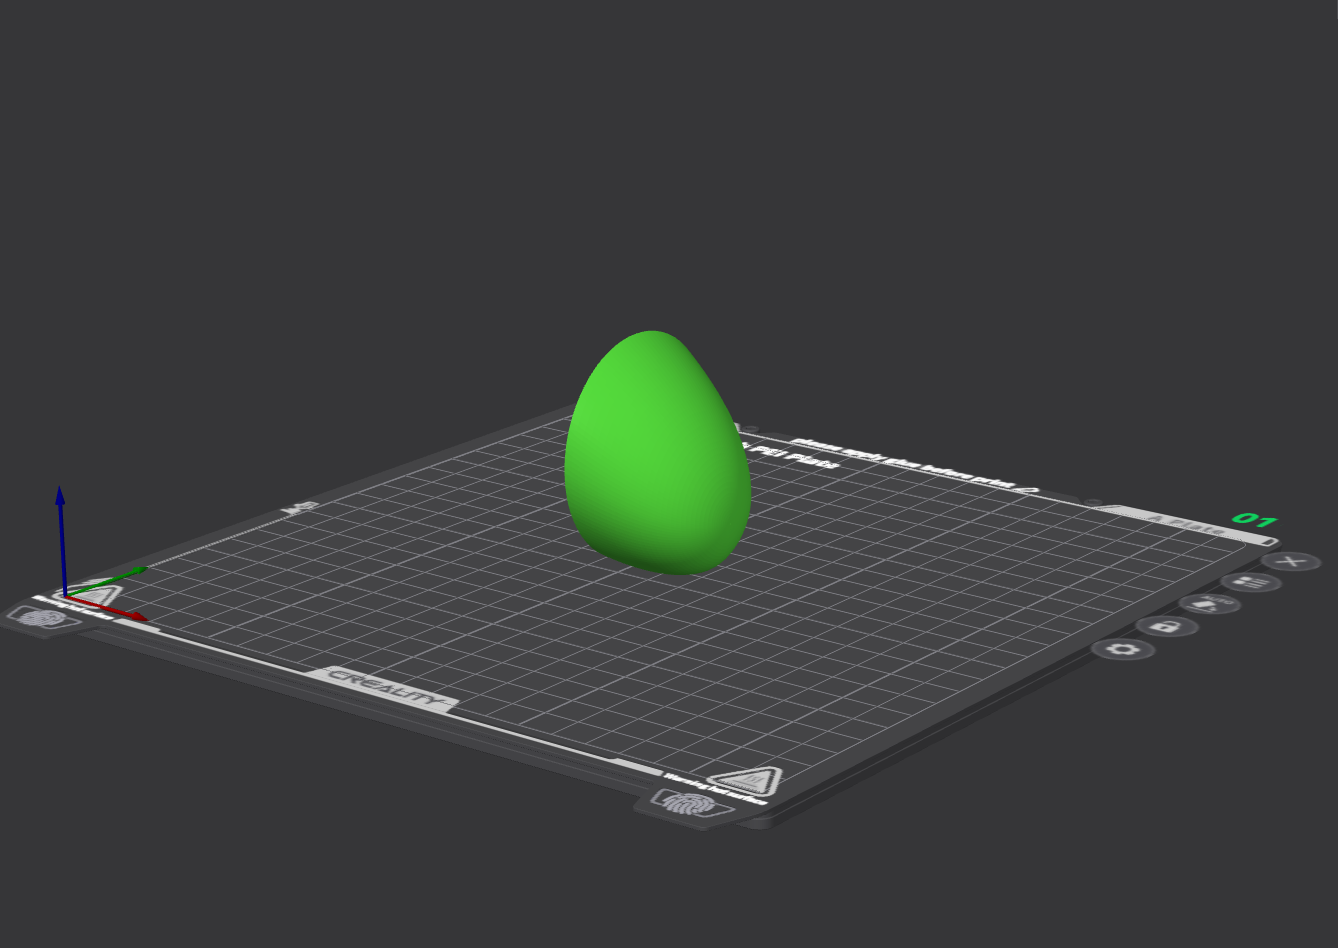
Print the following parts oriented as shown in the images.
Printing tips
- Orient convex protrusions sideways to prevent fractures at the base when attaching/detaching.
- Always enable support material.
- smabo-hardware/stl/hand/sg90/sg90_plate_1.stl × 2
Print 2 (same part used on left and right)
- smabo-hardware/stl/hand/sg90/sg90_plate_2.stl × 2
Print 2 (same part used on left and right)
- smabo-hardware/stl/hand/sg90/sg90_base.stl × 2
Print 2 (same part used on left and right)
- smabo-hardware/stl/hand/sg90/arm_hand.stl × 2
Print 2 (same part used on left and right)
Assembly#
Assemble the required parts as shown in the video below.
Note: the video also includes parts printed in previous steps.
Assembly tips
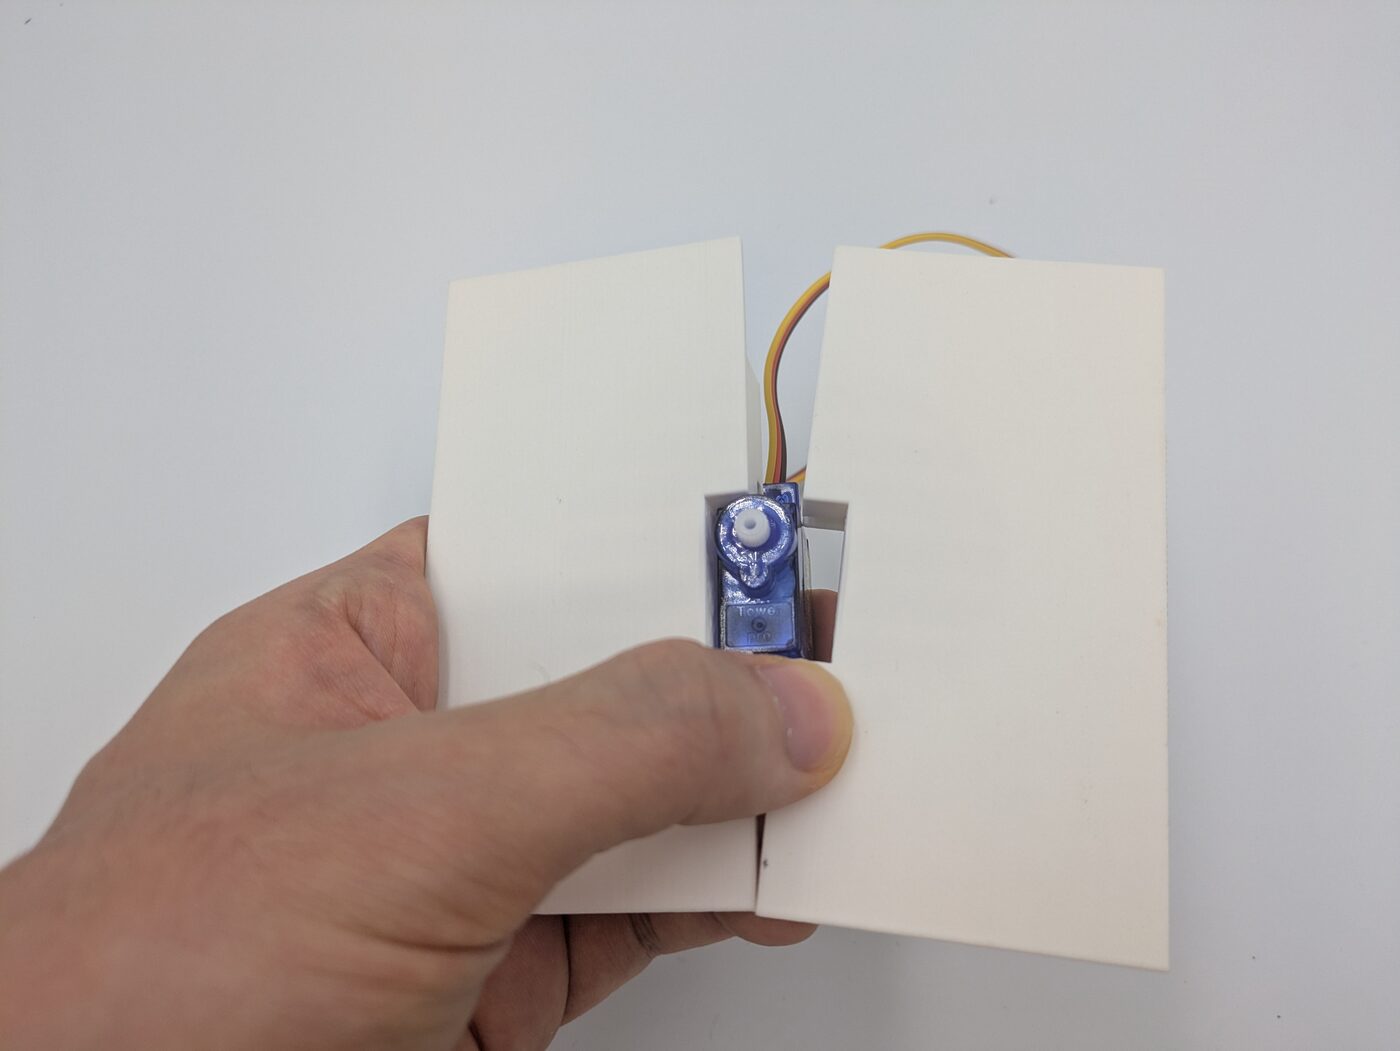
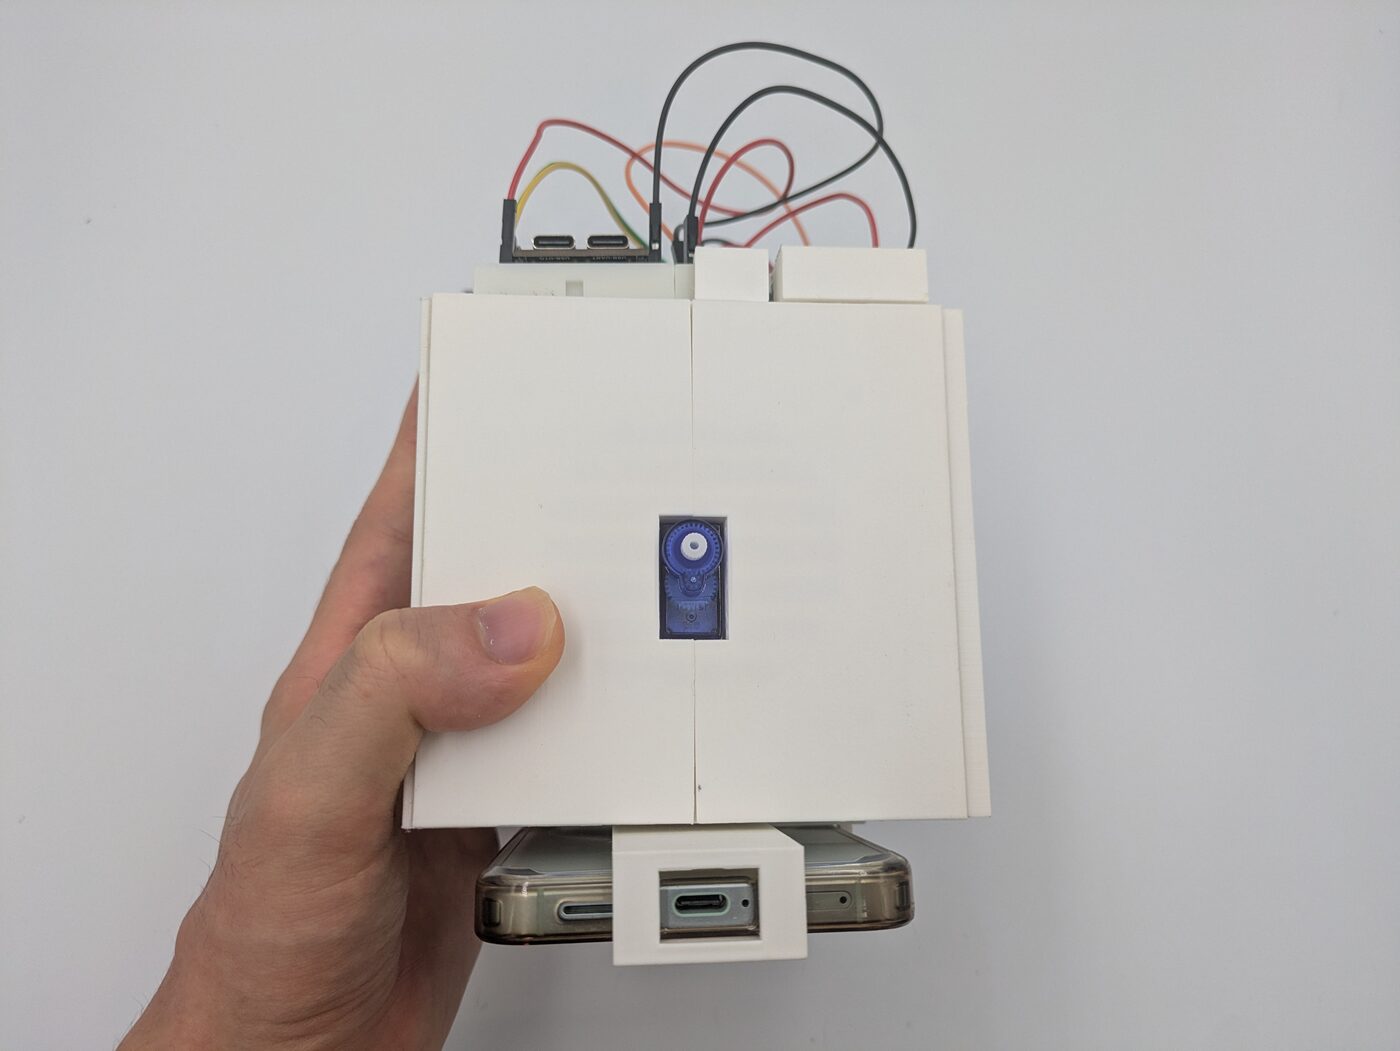
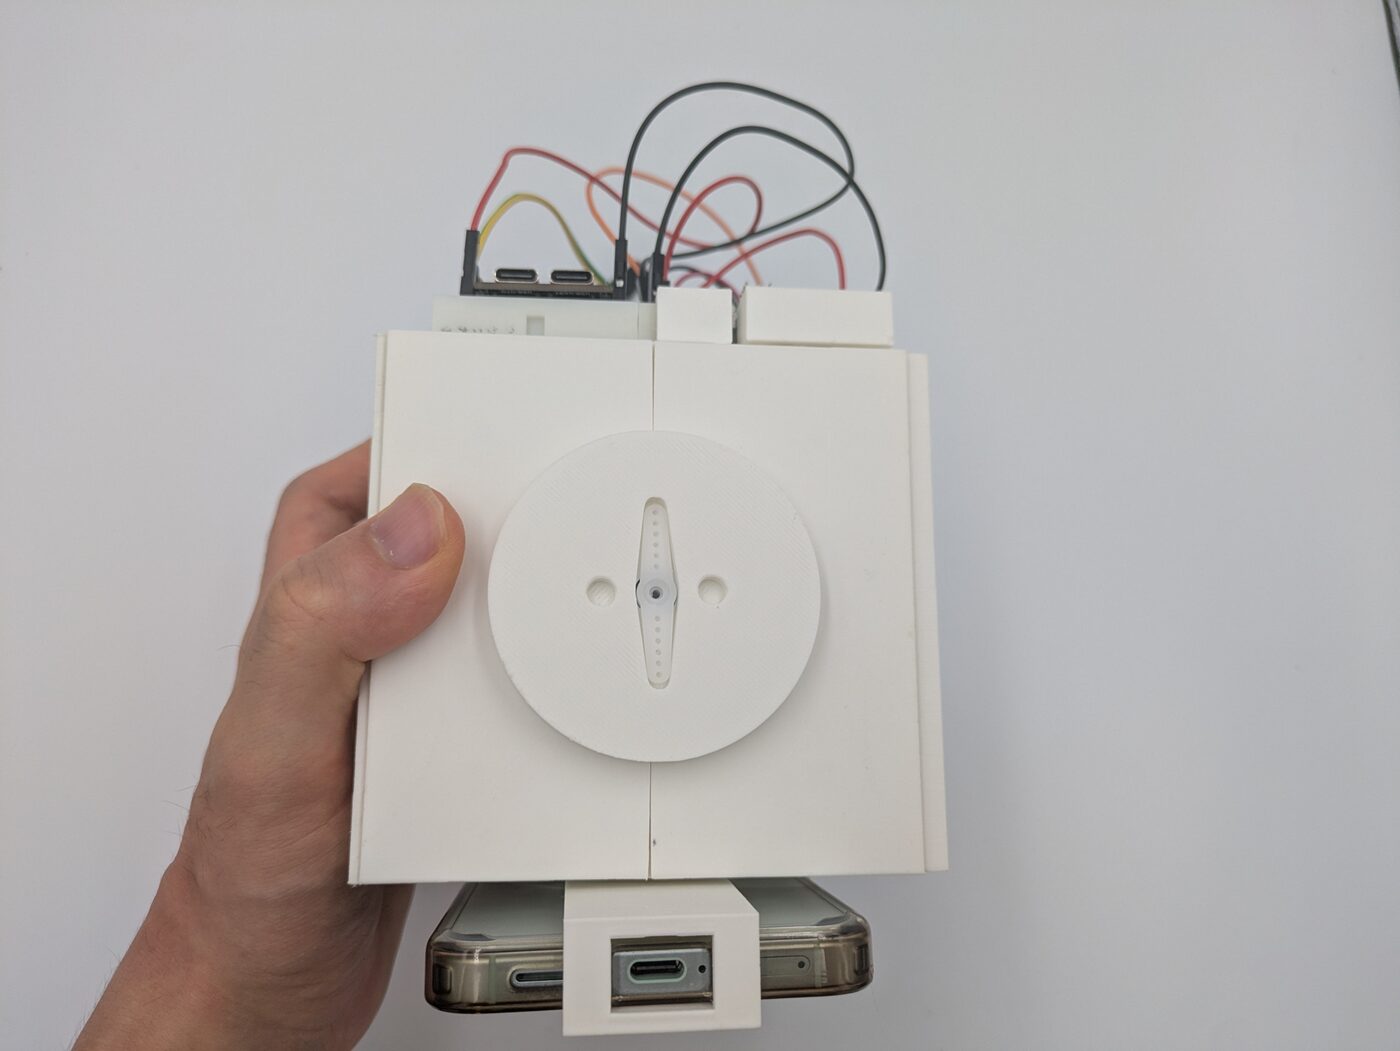
The assembly video does not show how to attach the SG90 servos, so the steps are described here.
First, fix the SG90 between sg90_plate_1 and sg90_plate_2 as shown, then attach the assembly to the body.
Slide sg90_base over from the top and fit the horn in. No tools required, but you may optionally screw the horn to the servo using the included screws.
Wiring#
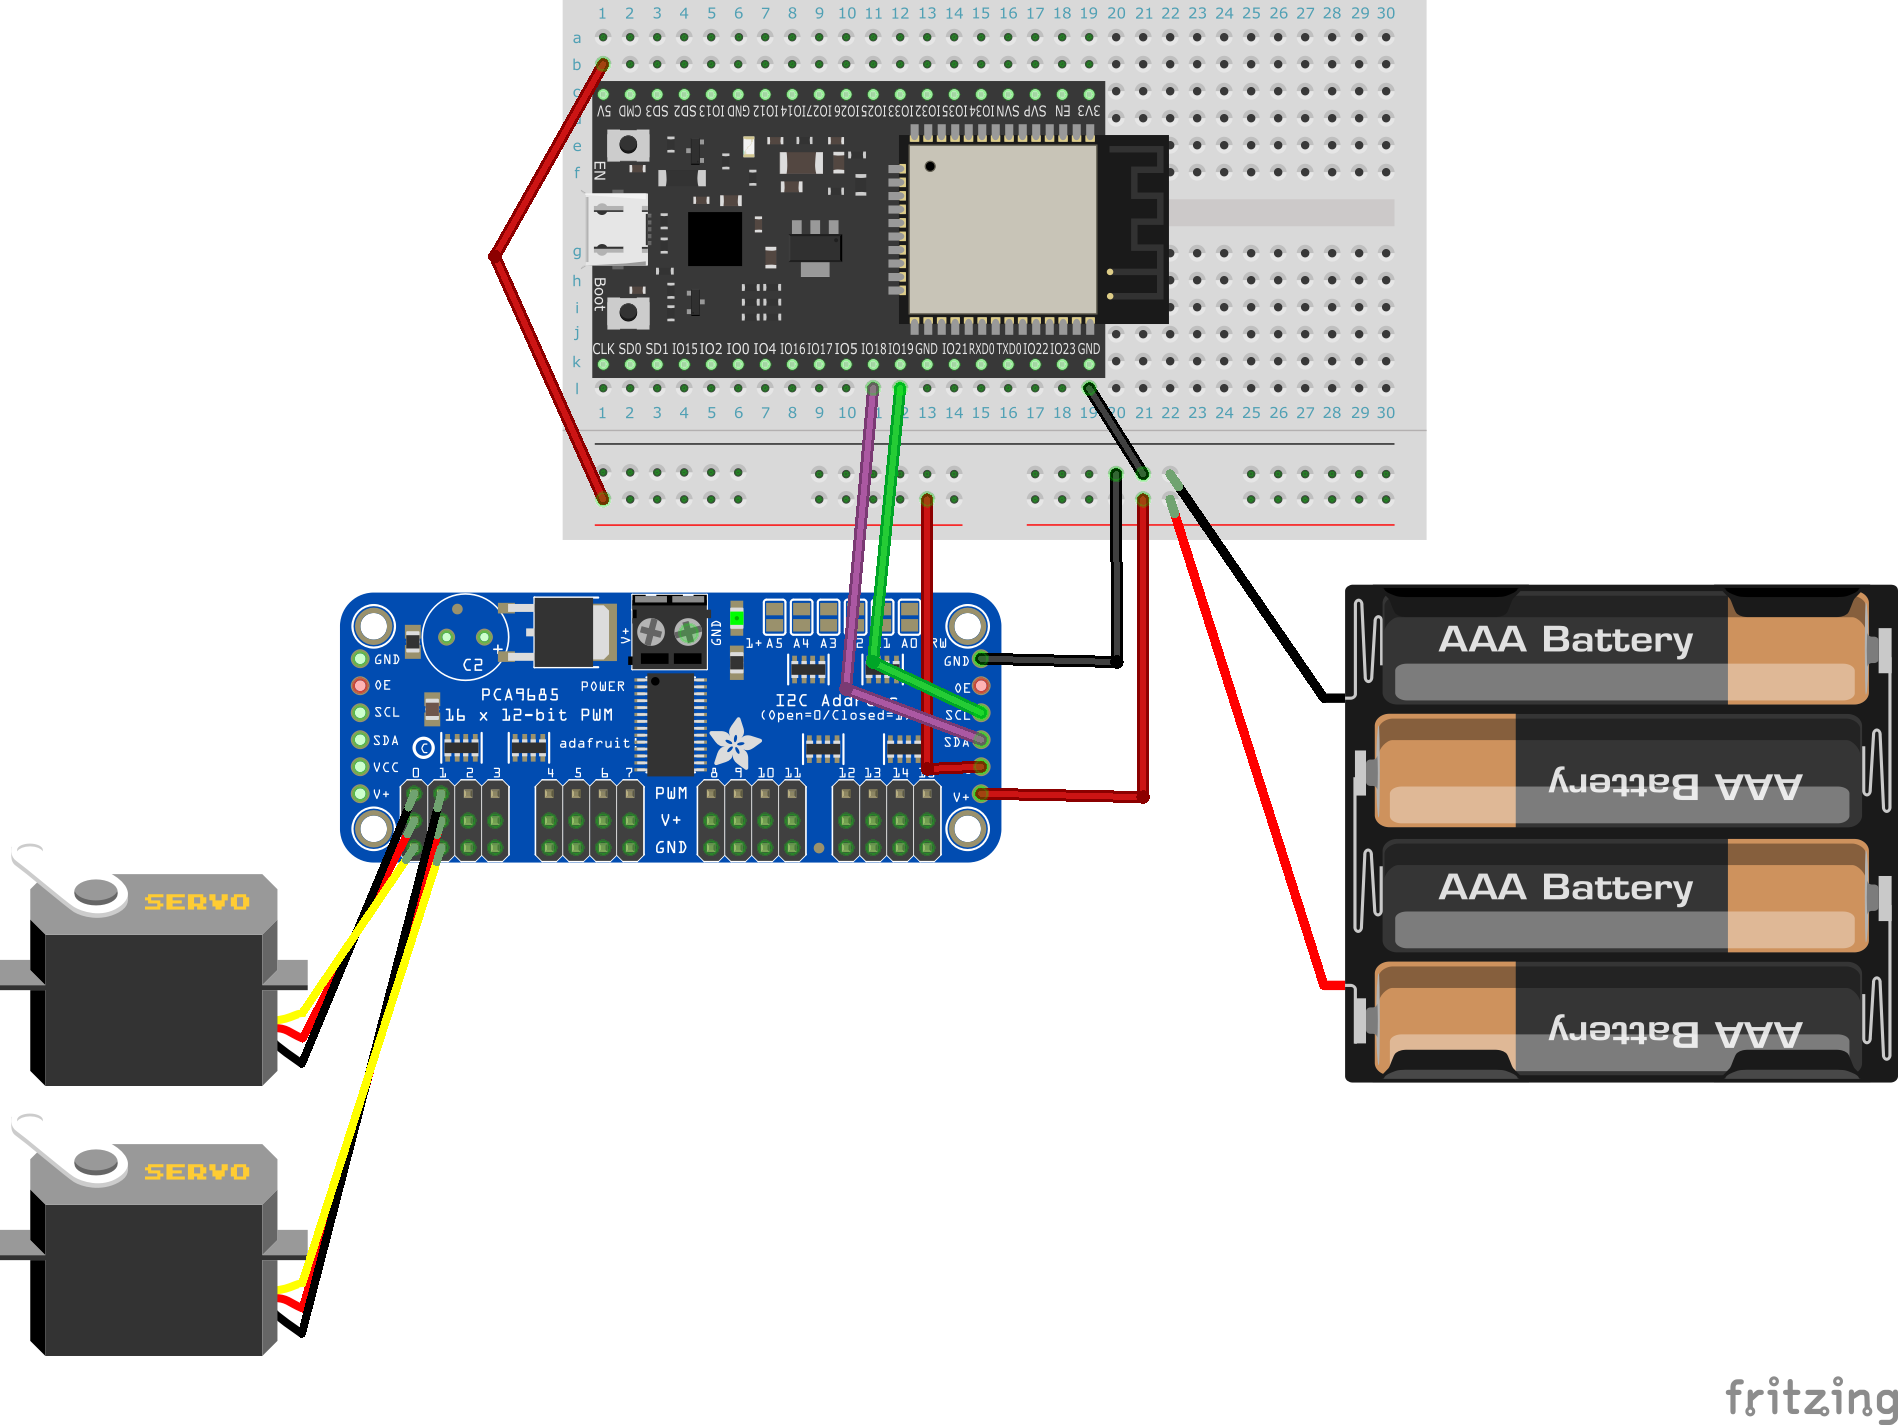
Wire according to the table below.
In the table, "Point A" and "Point B" are directly connected in the circuit.
| Point A | Point B | Notes |
|---|---|---|
| Battery box (+) | Breadboard + rail (right side) | Right rail = 6 V; do not mix with 5 V side |
| Battery box (-) | Breadboard - rail | - |
| ESP32 5 V pin | Breadboard + rail (left side) | Left rail = 5 V; do not mix with 6 V side |
| ESP32 GND | Breadboard - rail | - |
| PCA9685 V++ | Breadboard + rail (right side) | - |
| PCA9685 VCC | Breadboard + rail (left side) | - |
| PCA9685 SDA | Pin set in config.json i2c/sda |
- |
| PCA9685 SCL | Pin set in config.json i2c/scl |
- |
| PCA9685 GND | Breadboard - rail | - |
Wiring diagram for ESP32-DevKitC:
In default config, connect the left arm servo to channel=0, and the right arm servo to channel=1.
Wiring tip
Route the SG90 cables through the gap at the bottom-right of the smabo back panel to reach the PCA9685.
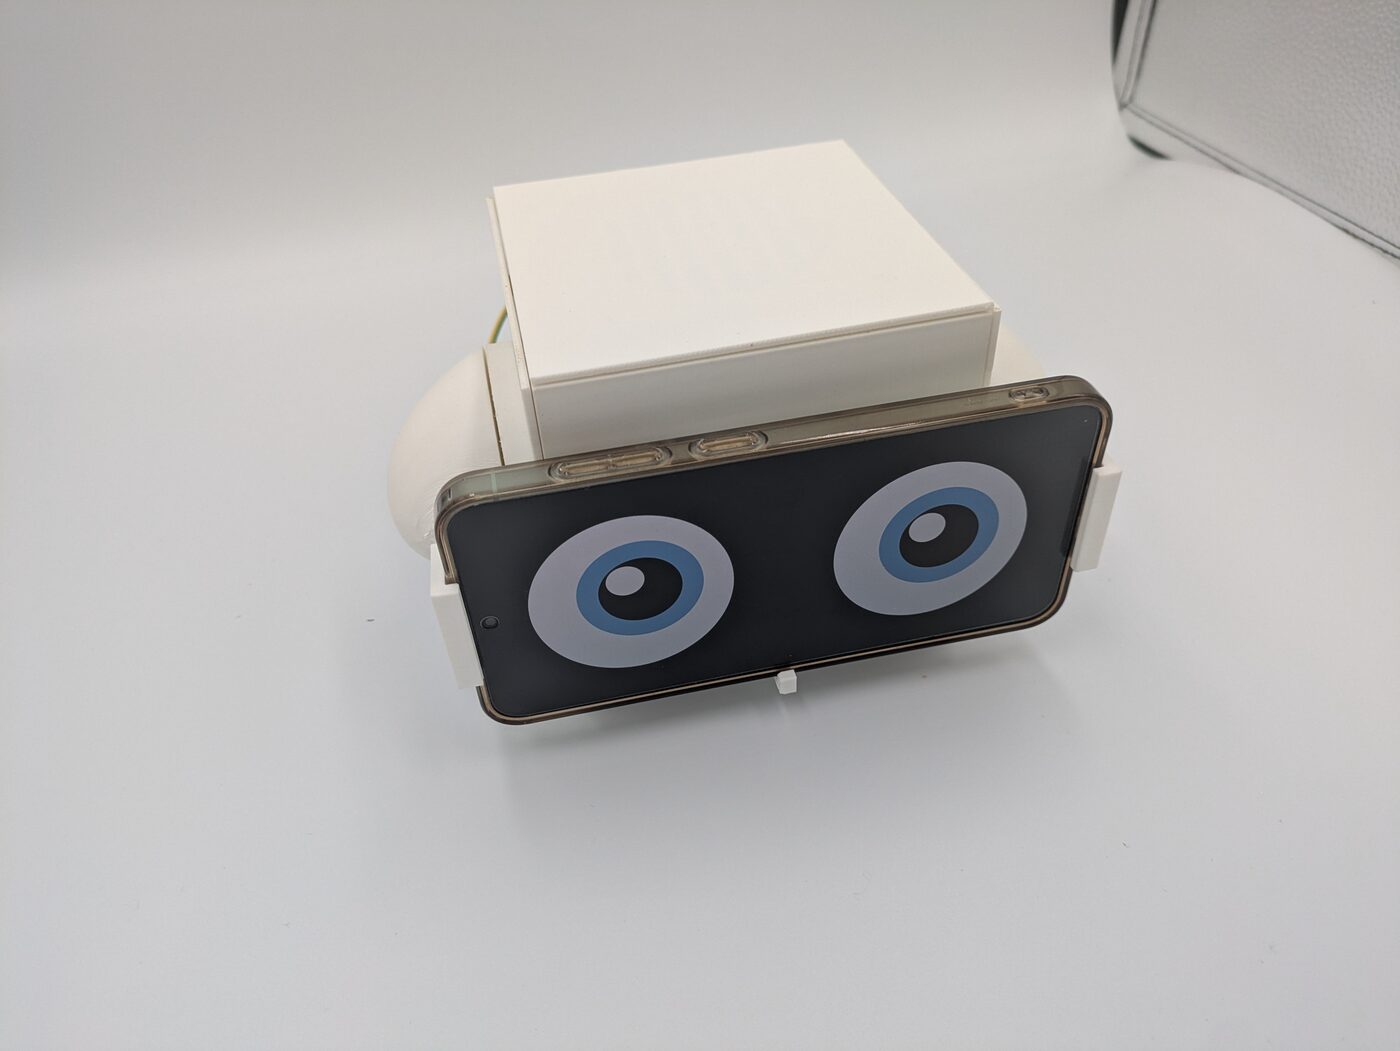
Finished Result#
The completed robot looks like this.
Operation#
Startup Procedure#
Follow the startup procedure here.
Servo Settings#
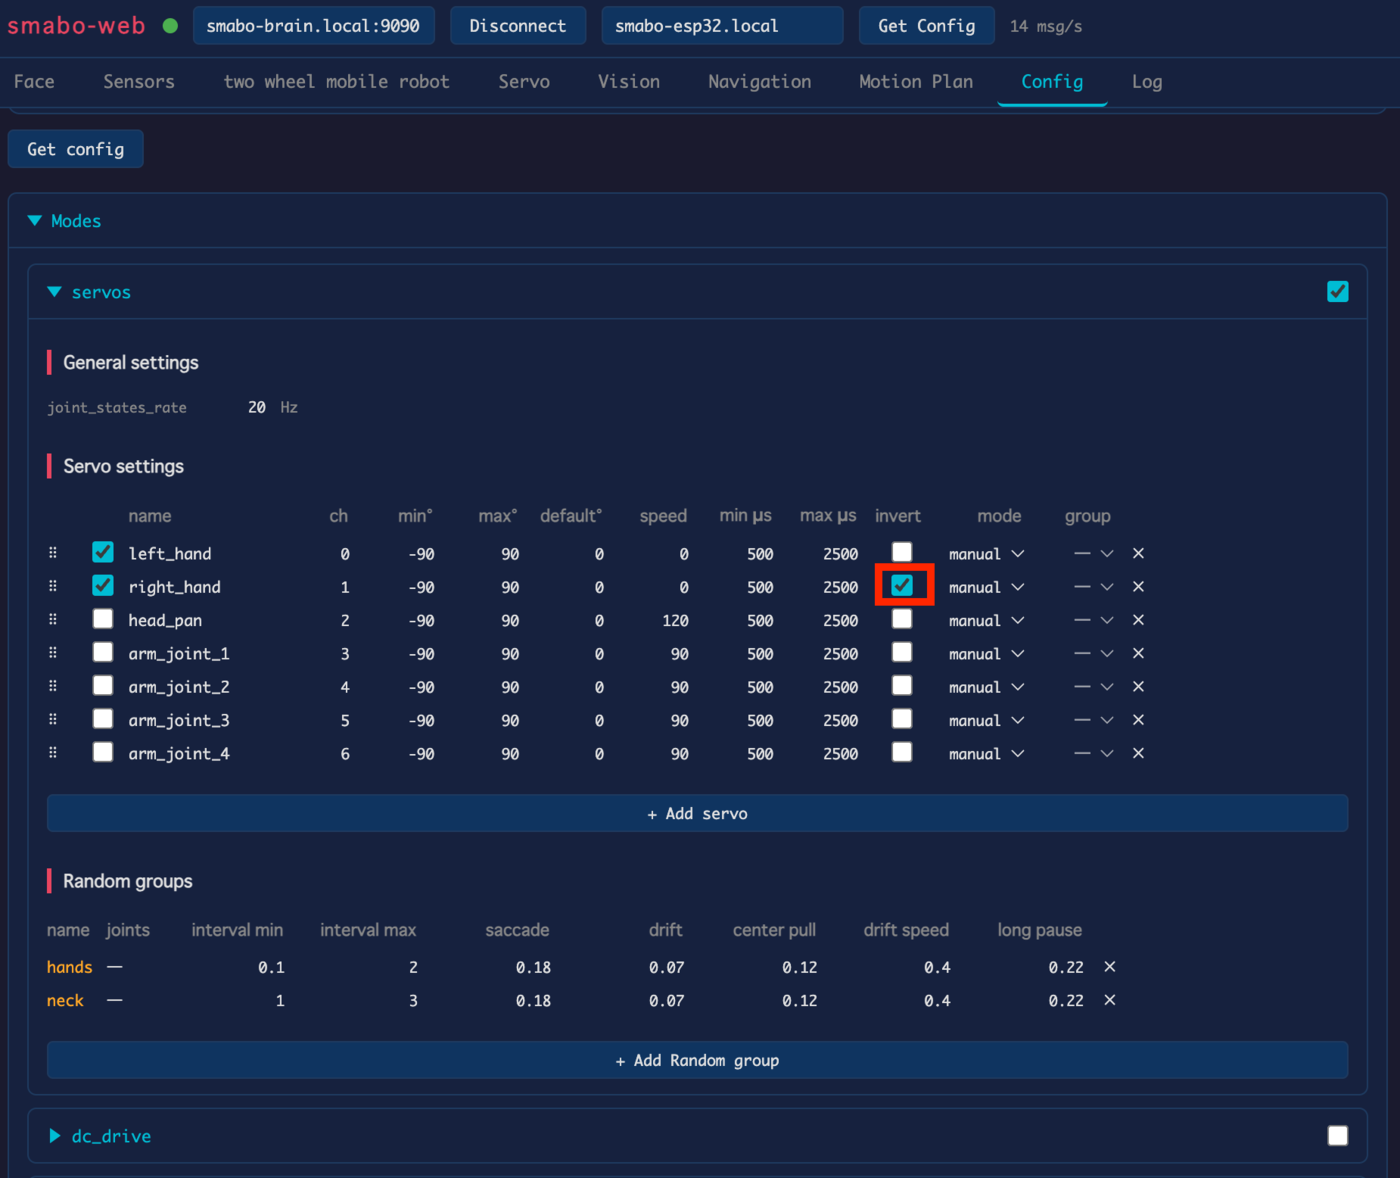
Servo settings can be changed in the 'Modes/servos' section of the 'Config' tab in smabo-web.
First, since the left and right hand servos are mounted in opposite directions, enable:
- 'inverse' for 'right_hand' only
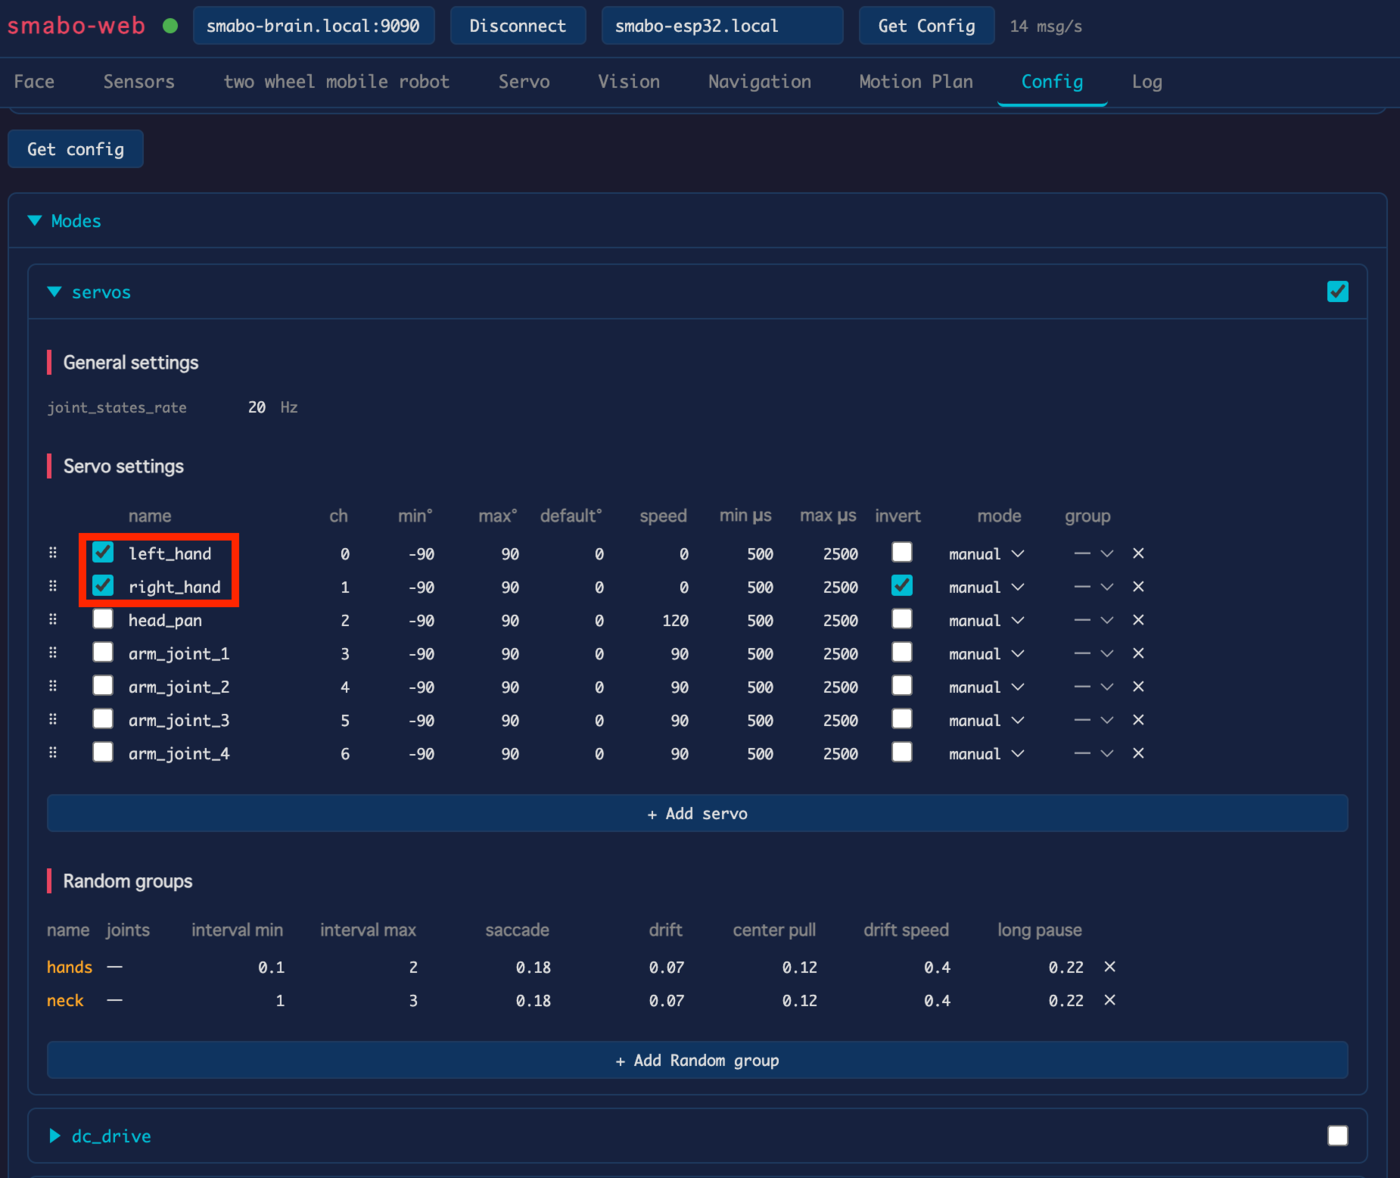
Next, enable:
- 'left_hand' and 'right_hand'
Manual Control#
Steps for manual controller control.
In the 'Config' tab → 'Modes/servos', for left_hand and right_hand, set:
- 'mode' to 'manual'
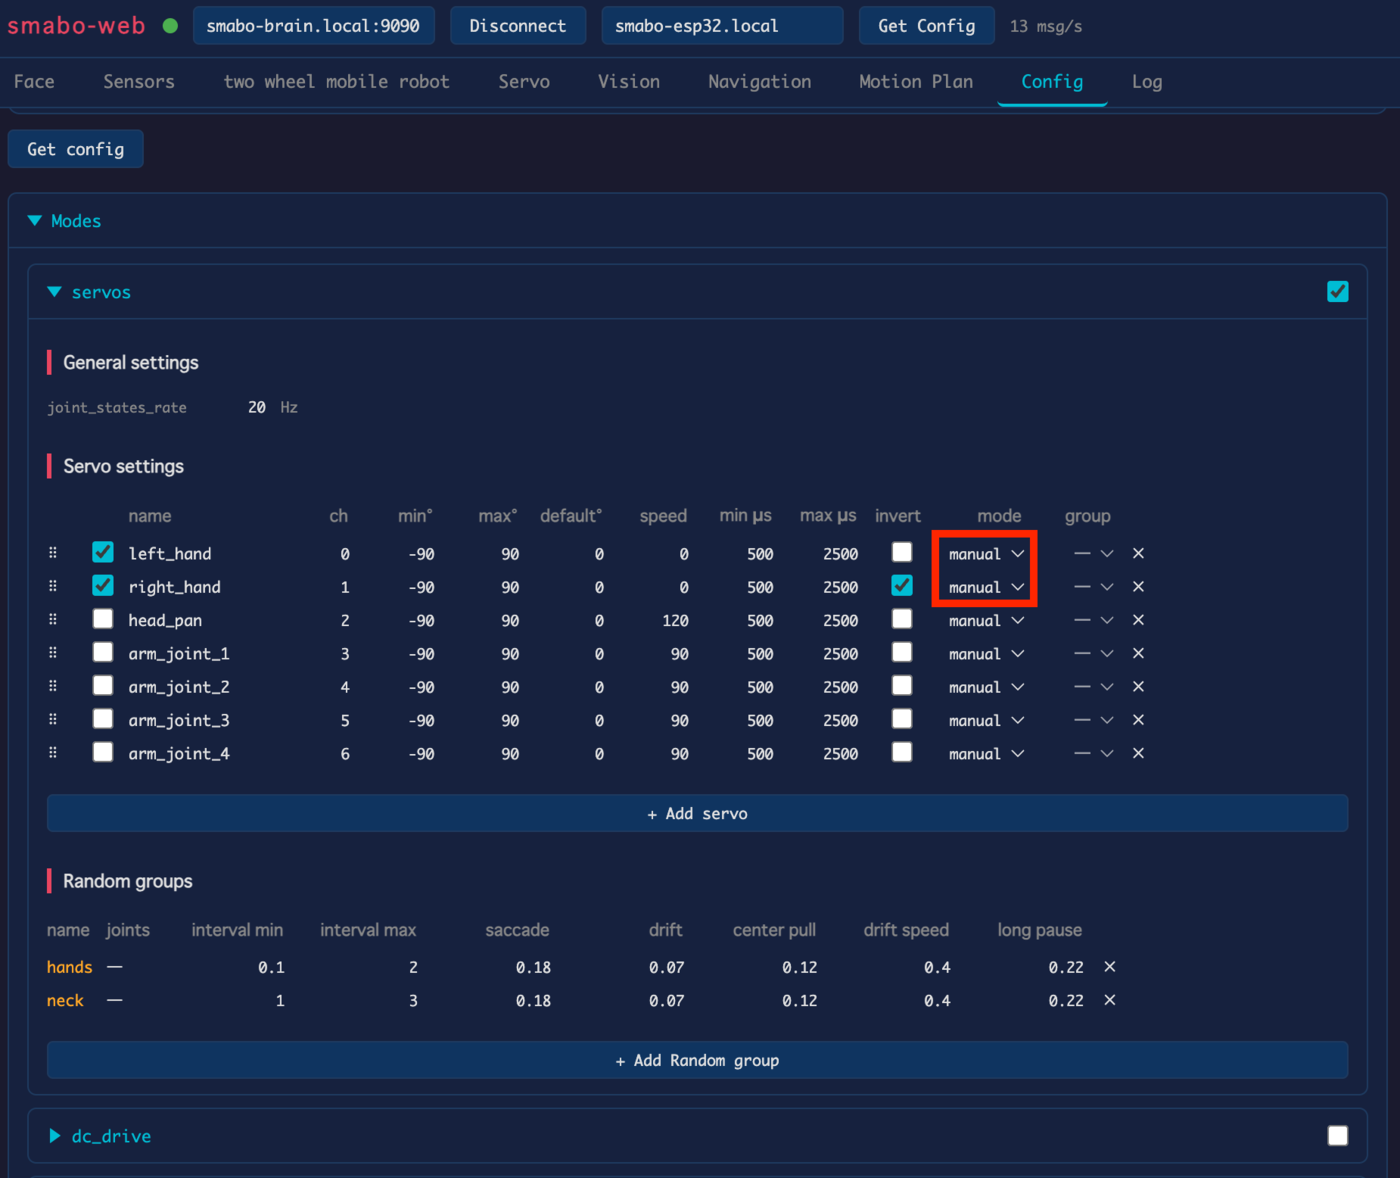
Adjust servo angles in the 'Servo' tab to move both arms.
Random Control#
Steps for random motion control.
In the 'Config' tab → 'Modes/servos', for left_hand and right_hand, set:
- 'mode' to 'random'
- 'group' to 'hands'
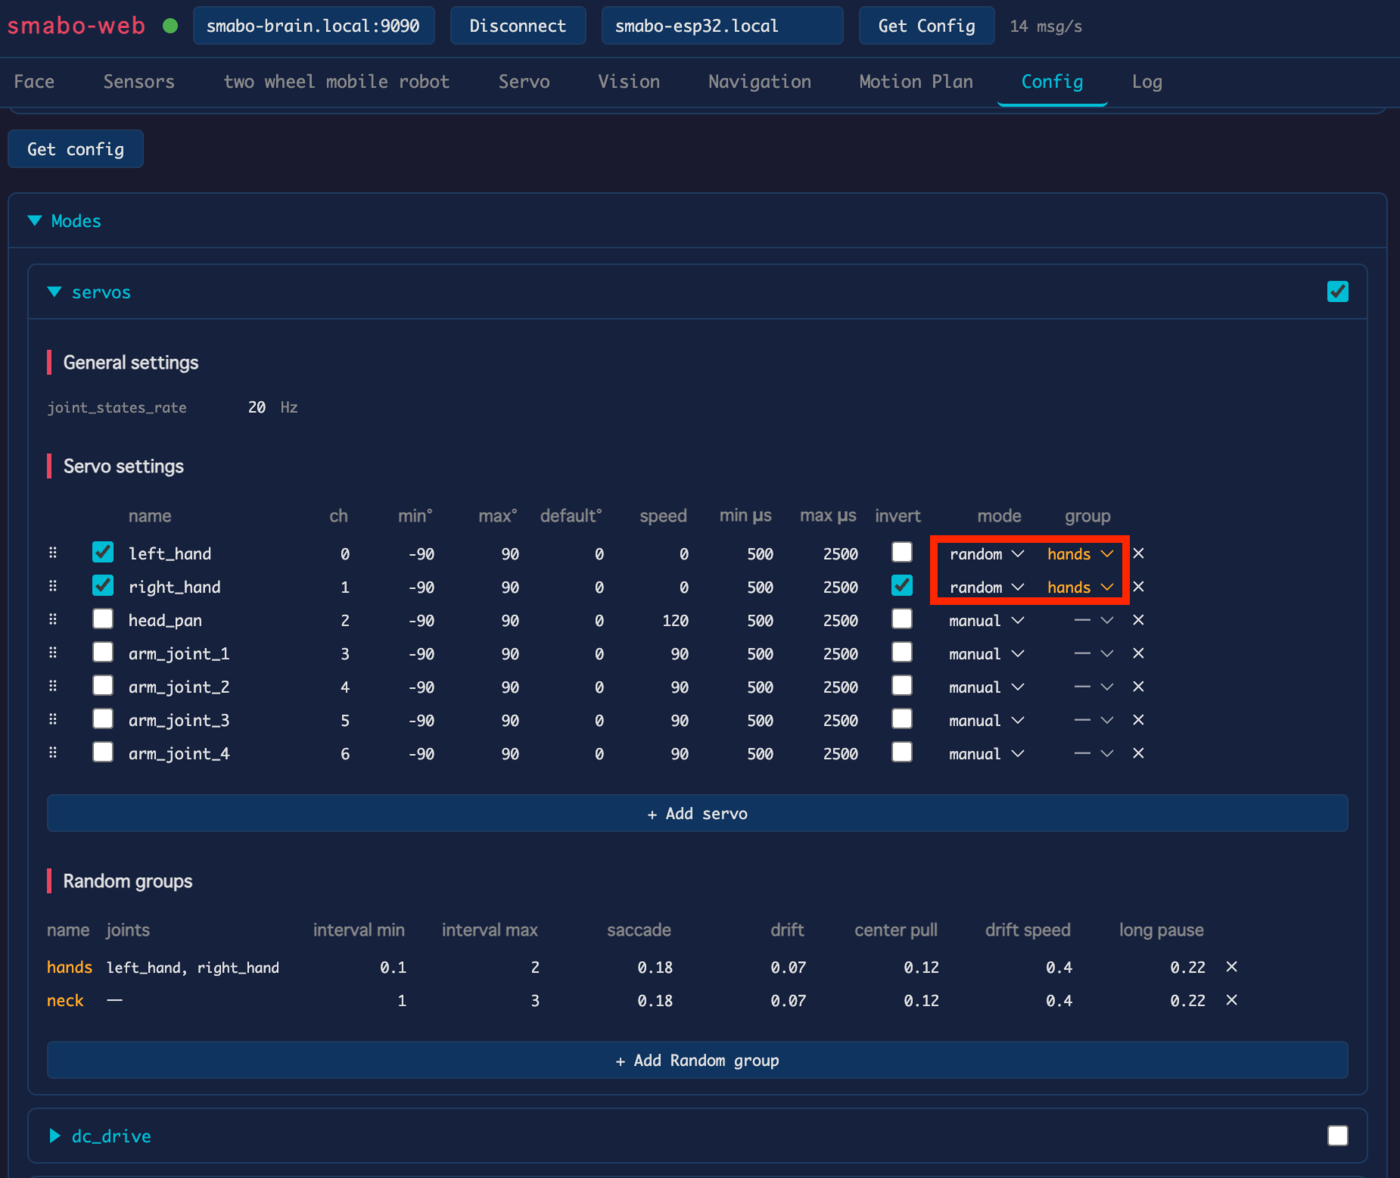
random_group
Servos assigned to the same random_group will move at the same random time.
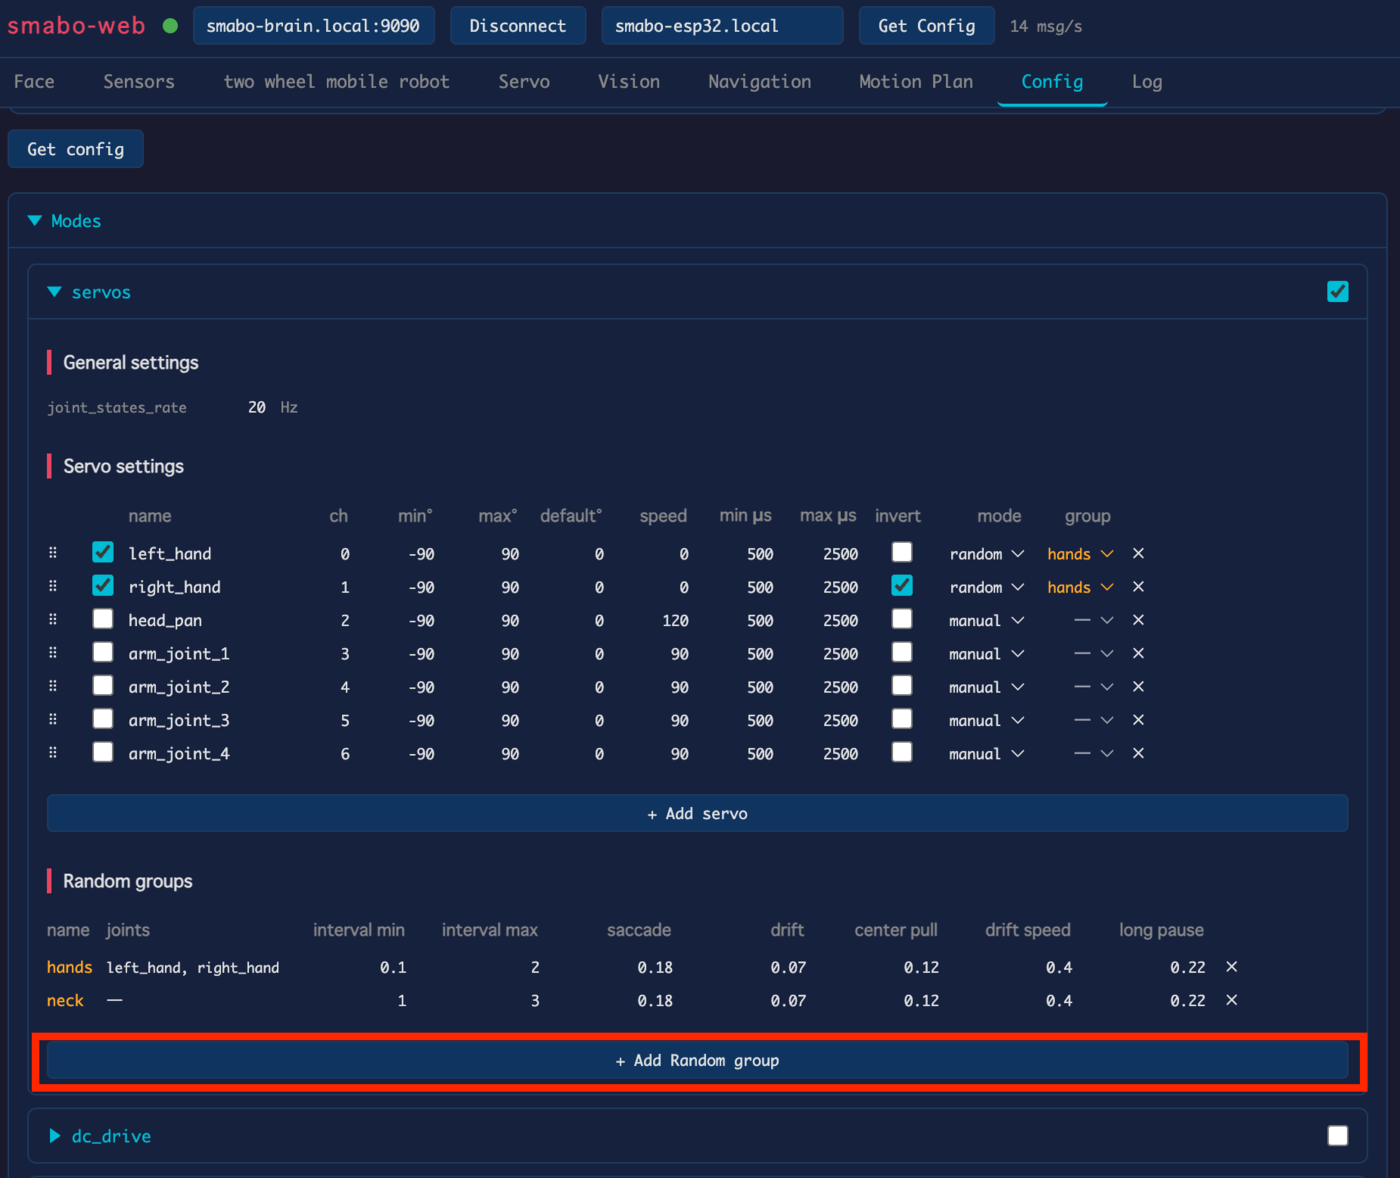
If you want the left and right hands to move at independent random times, assign left_hand and right_hand to different random_groups.
New random_groups can be added by clicking the "Add random Group" button.
After a moment, both hands will move at random intervals.
Next#
This is a terminal node on the roadmap.
smabo has many other features to explore.
If you want to explore other features, pick another page from the roadmap.